
Braze clients can enhance their retargeting efforts within the mobile advertising space by setting up an integration with mDSP through the Braze webhook channel. This integration allows the streaming of events to mDSP, adding depth to data used for retargeting purposes.
Retargeting Cases
Consider retargeting users under these circumstances:
- A change occurs in a customer’s email or push notification subscription status.
- A customer interacts with a campaign from Braze.
- A customer enters a designated geofence.
Integration Requirements
- Android App ID (e.g., “com.example”)
- iOS App ID (e.g., “012345678”)
- Activation of IDFA Collection in the Braze SDK (optional, disabled by default)
- Collection of Google Advertising ID via Custom Attribute (optional, can be collected as a custom attribute)
Braze does not automatically collect device IDFA/AAID; these must be manually stored and may require user consent.
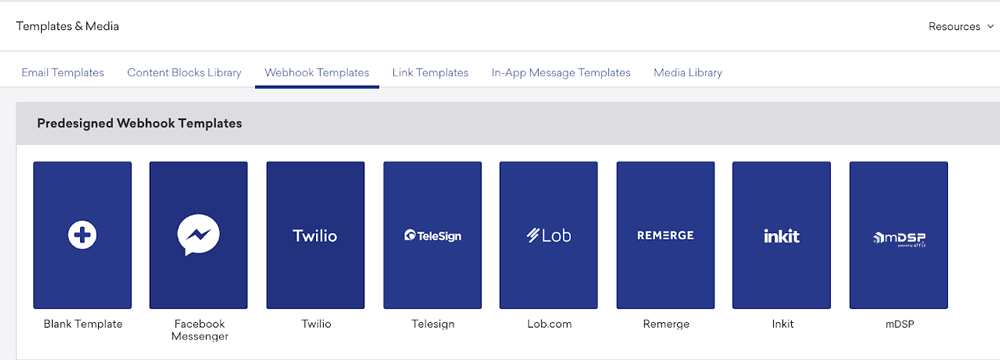
Integration Steps1. Create a Webhook Template in Braze
- Initiate this from the Templates & Media section or start a new Webhook Campaign in Braze.
2. Configure Your Template
- Define the event name to display on your mDSP dashboard.
- Include your app's unique identifier for both Android (e.g., “com.example”) and iOS (e.g., “012345678”).
- Add the liquid syntax for the Google Advertising ID custom attribute you are tracking.
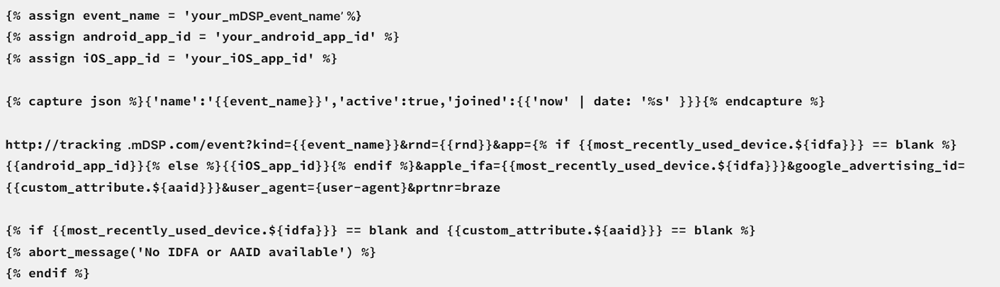
Example Webhook URL configurations:
- Webhook Template for iOS and Android
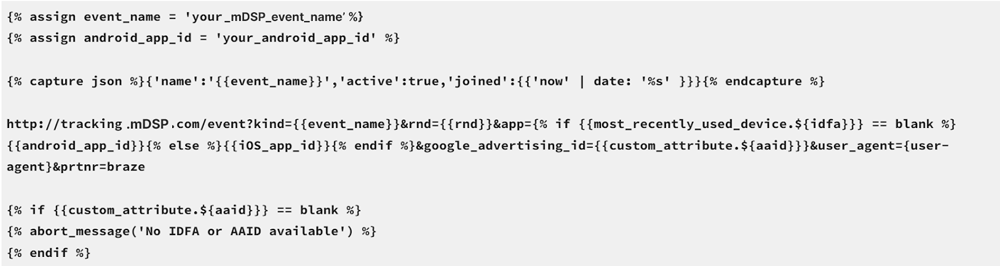
- Webhook Template for Android
- Webhook Template for iOS
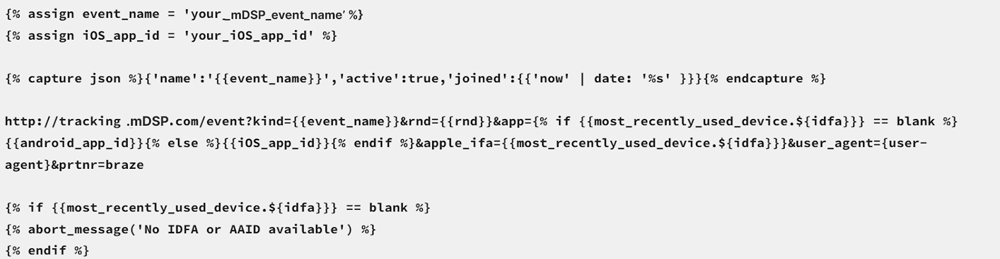
Modify the following elements before launching:
- {% assign event_name = 'your_mdsp_event_name' %}
- {% assign android_app_id = 'your_android_app_id' %}
- {% assign iOS_app_id = 'your_iOS_app_id' %}
- &google_advertising_id={{custom_attribute.${aaid}}
Replace aaid with the appropriate custom attribute name set by your developers.
After defining the parameters above, insert this liquid code template into the Webhook URL field and edit as needed. You do not have to define a Request Body for this webhook. Here is the template in Braze:
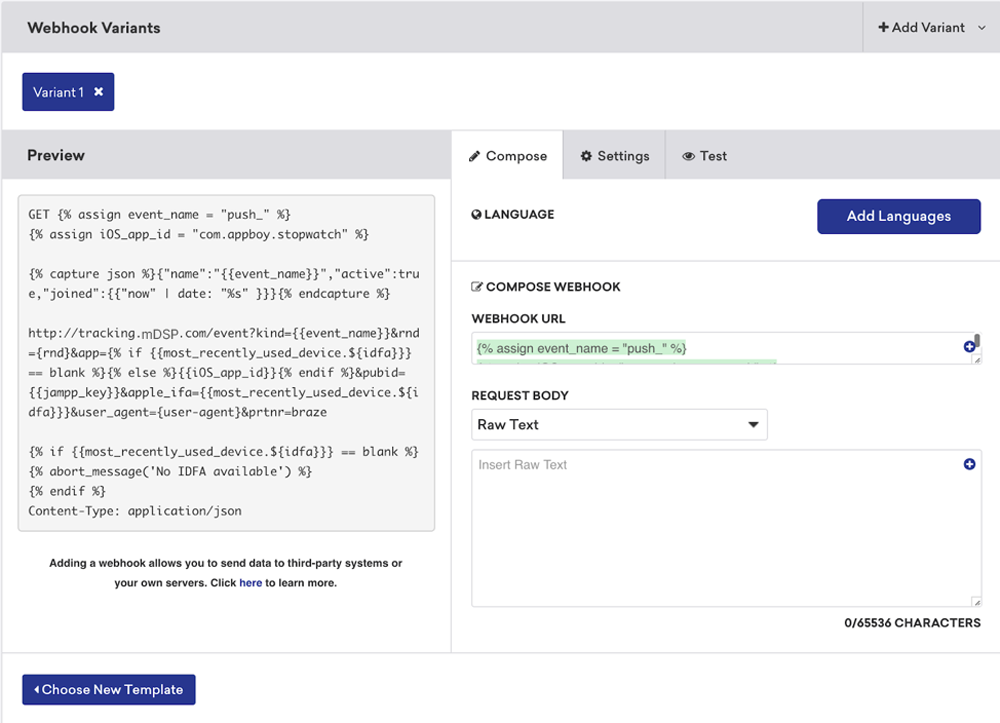
3. Request Headers and Method
- Ensure the Content-Type is correctly set in the webhook settings.

When you are done, hit Forward
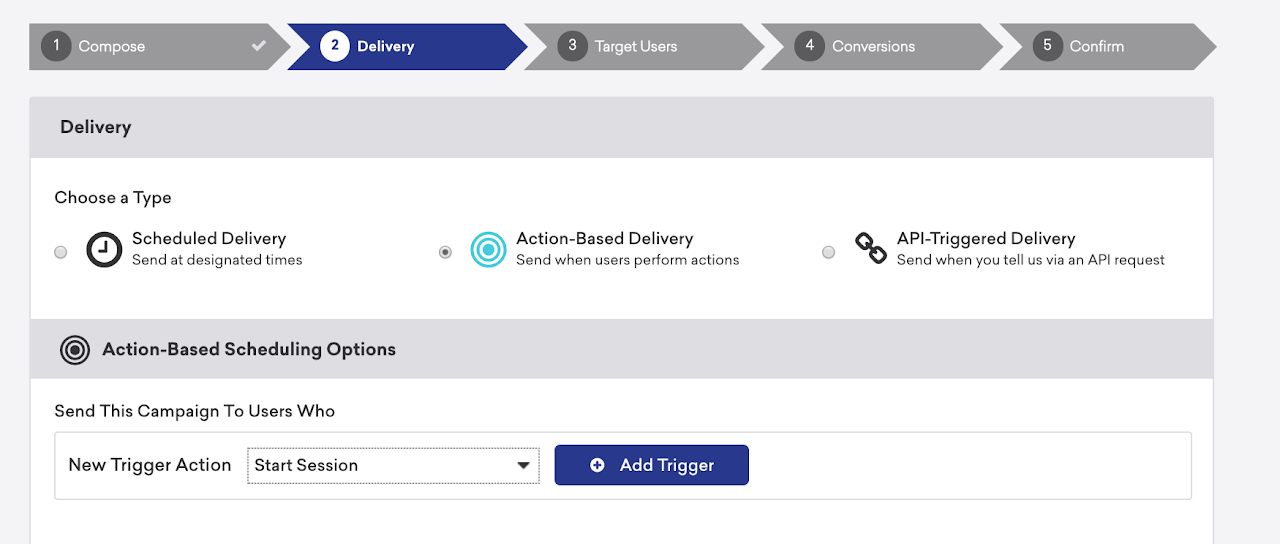
4. Set Up Delivery
- Select "Action-Based Delivery".
- Choose the appropriate triggers under "New Trigger Action".
- Proceed to the next step.
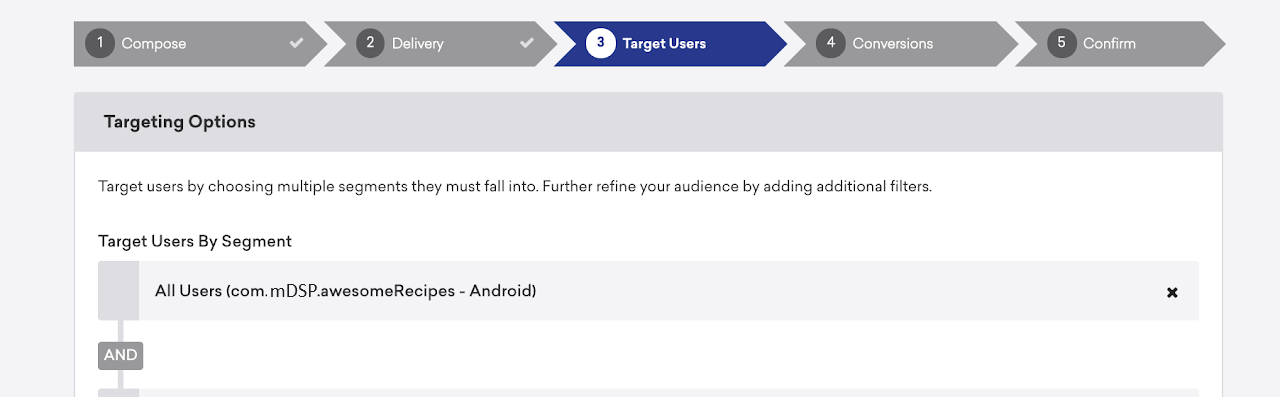
5. Target User Selection
- Choose the user segments affected by this webhook, with an option for All Users if universally applicable.
6. Final Confirmation
- Skip the "Conversions" section and confirm your settings.
- Launch the campaign by clicking "Launch Campaign".
