
1. FORWARDING EVENTS
In this section, you'll learn how to map your Kochava events with mDSP via postbacks.
1. Log in to Kochava:
- Access your Kochava account and navigate through the following steps.
2. Select Account and App:
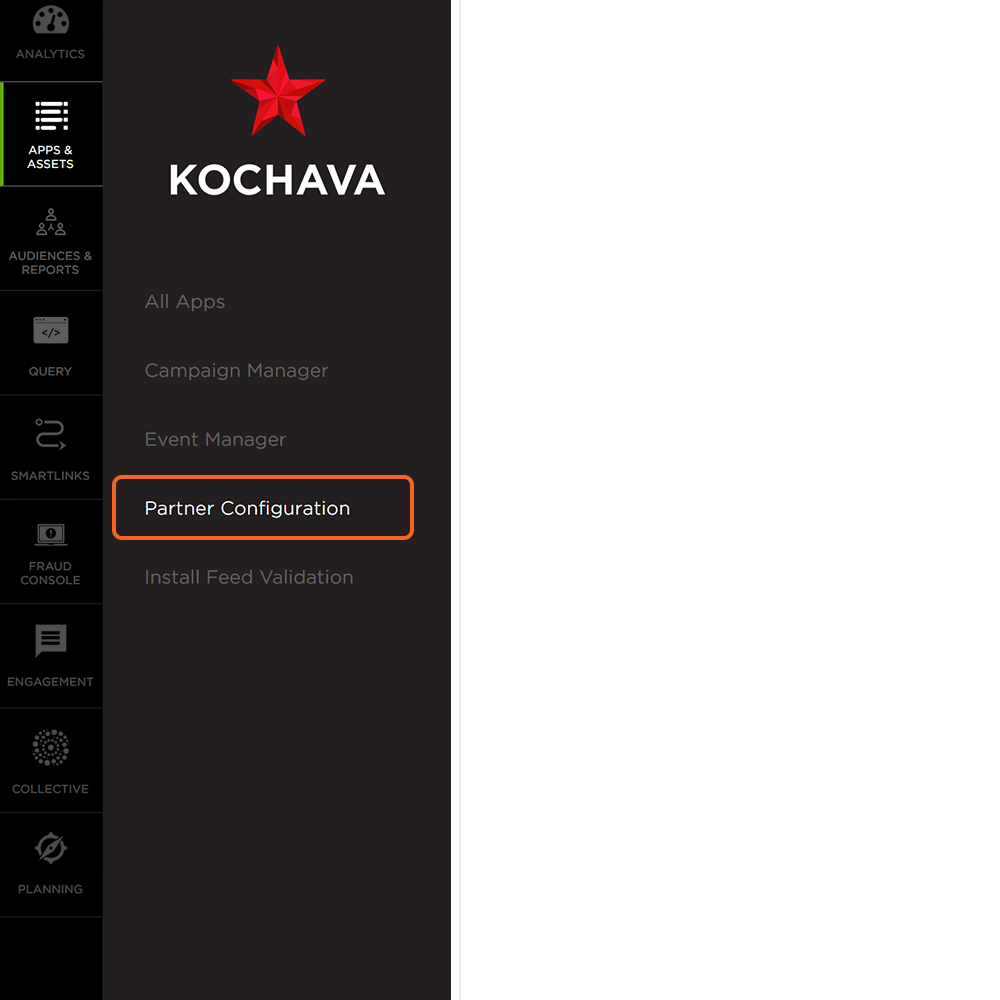
- Choose the desired Account and App, then click on "Apps & Assets > Partner Configuration."
3. New Configuration:
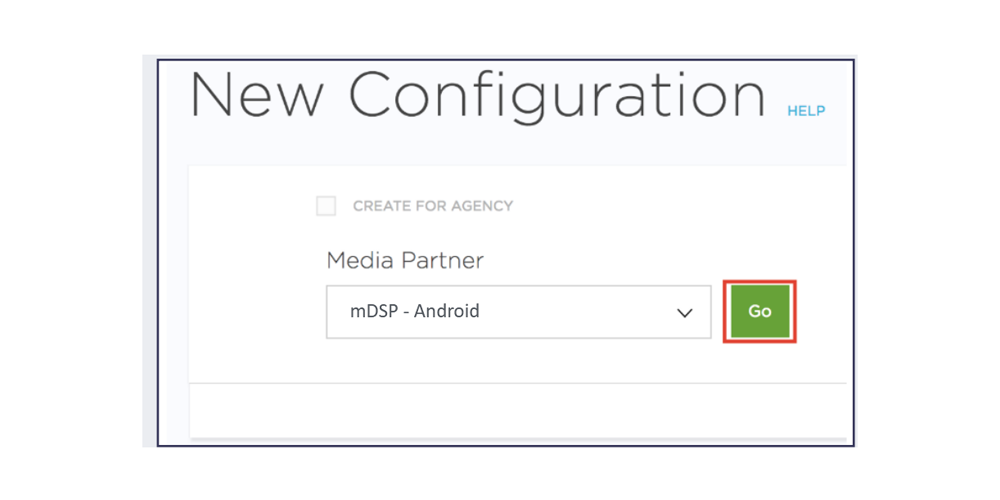
- Click on "Add a configuration" and select mDSP as the Media Partner.
4. Configure Postbacks for Events:
- You will need to edit the postback settings for every event, including "Install" and all "Active Events."
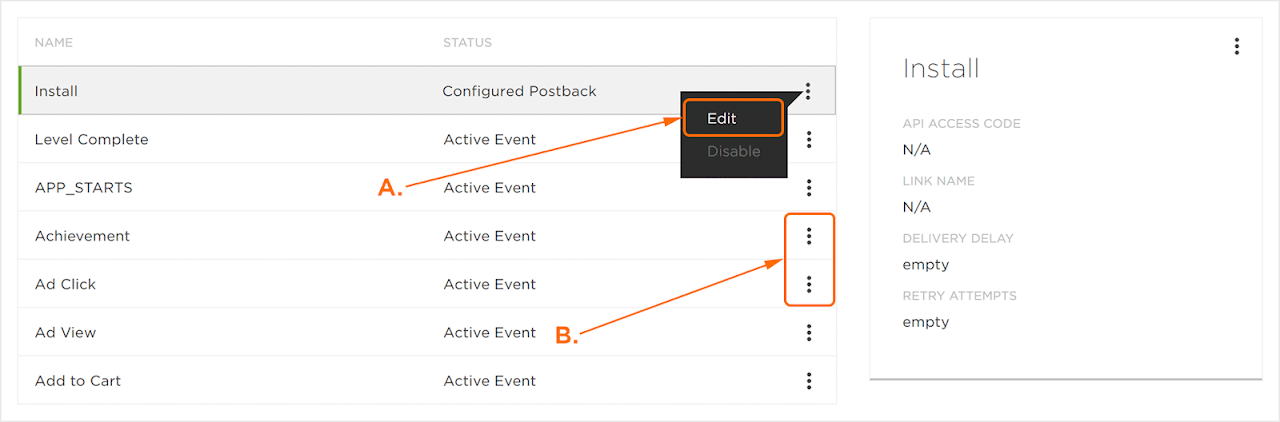
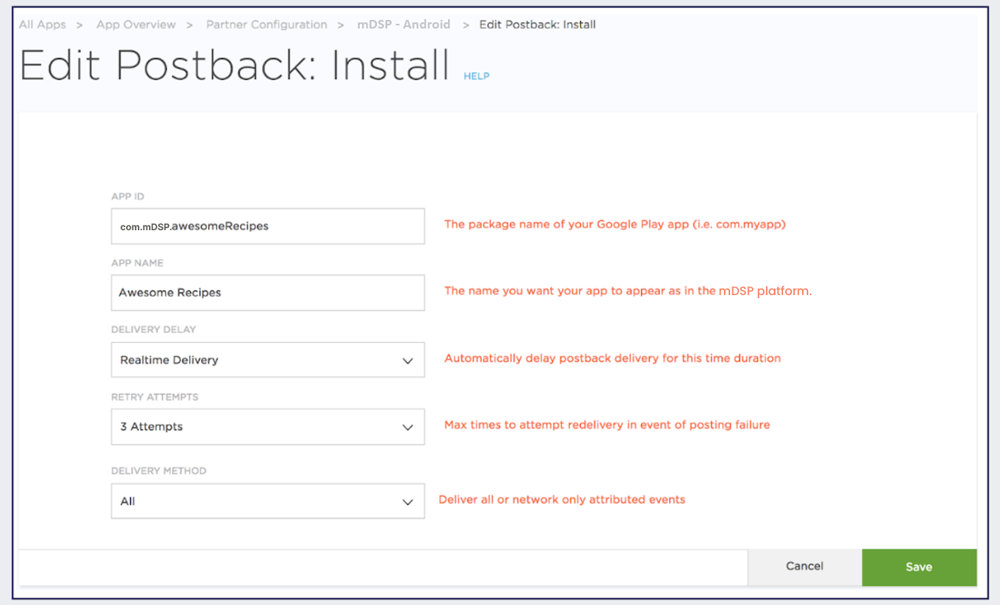
5. Edit Postback: Install:
- App ID: Send either the Package Name (Android) or the App Store ID (iOS), as appropriate.
- App Name: Enter the corresponding name of your app.
- Delivery Delay and Retry Attempts: Set to default values (Realtime Delivery and 3 Attempts).
- Delivery Method: Set to All. This is crucial as it enables mDSP to receive both Attributed and non-Attributed data for the event.
- Click "Save."
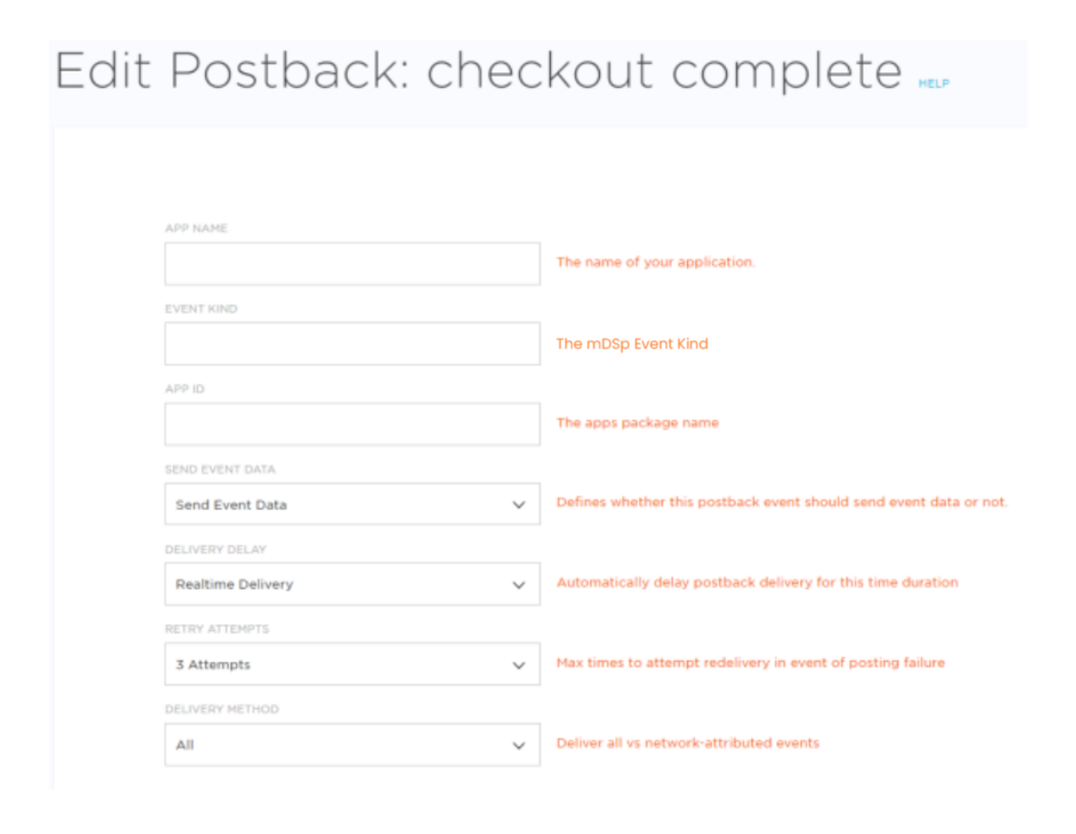
6. Edit Postback: Checkout Complete:
- For all Active Events:
- App Name: Use the same name as for the Install.
- Event Kind: Specify the event name.
- App ID: Send either the Package Name (Android) or the App Store ID (iOS), accordingly.
- Send Event Data: Enable this to send event metadata, supporting Dynamic Product Ads (DPA).
- Delivery Delay and Retry Attempts: Keep default settings (Realtime Delivery and 3 Attempts).
- Delivery Method: Set to All. This setting is important to ensure mDSP receives both Attributed and non-Attributed data.
- Click "Save."
7. Invalid Traffic Handling:
- If you activate the Kochava Anti-Fraud tool, toggle "Deliver Network Postback" ON so that mDSP can receive this data and enhance your traffic quality.

This module is now complete. The next step would be to generate the tracker.
2. GENERATING THE TRACKER
To generate Kochava's tracker URL for mDSP, follow these steps:
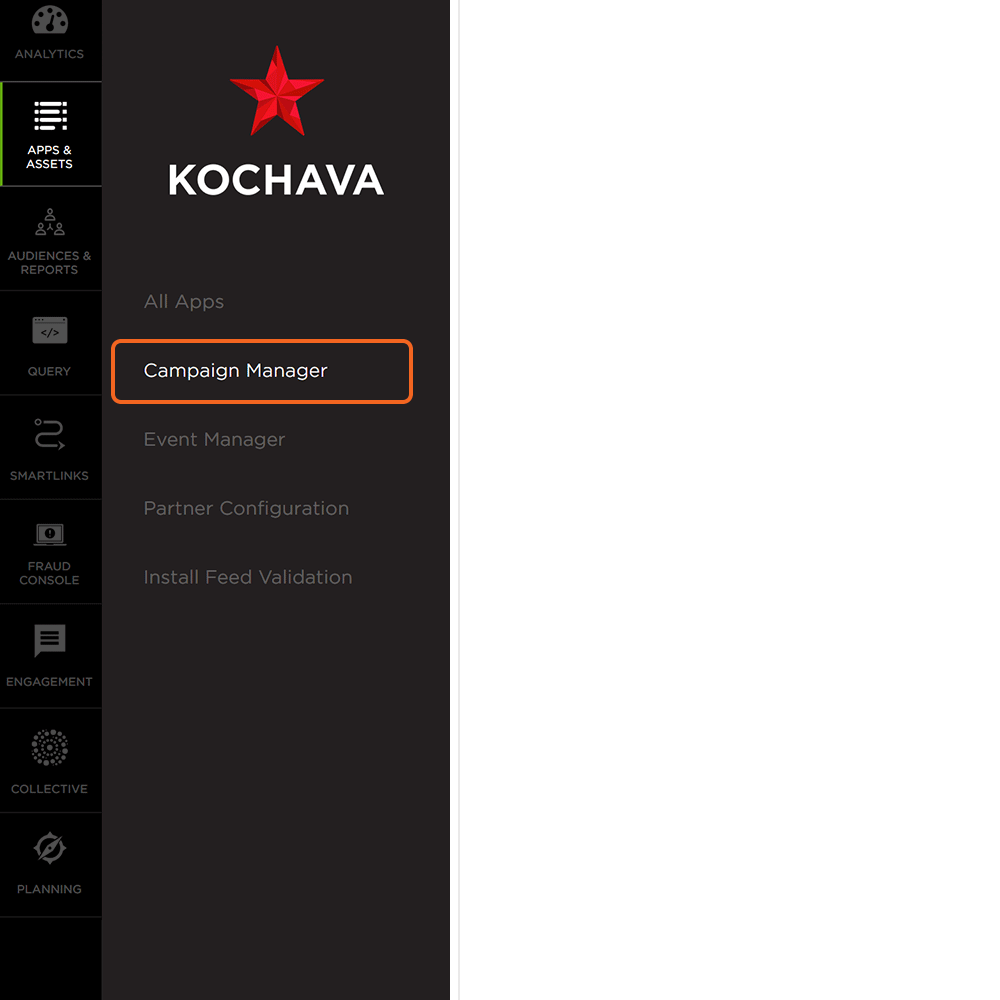
1. Select Account and App:
- Navigate to Apps & Assets > Campaign Manager within your desired Account and App.
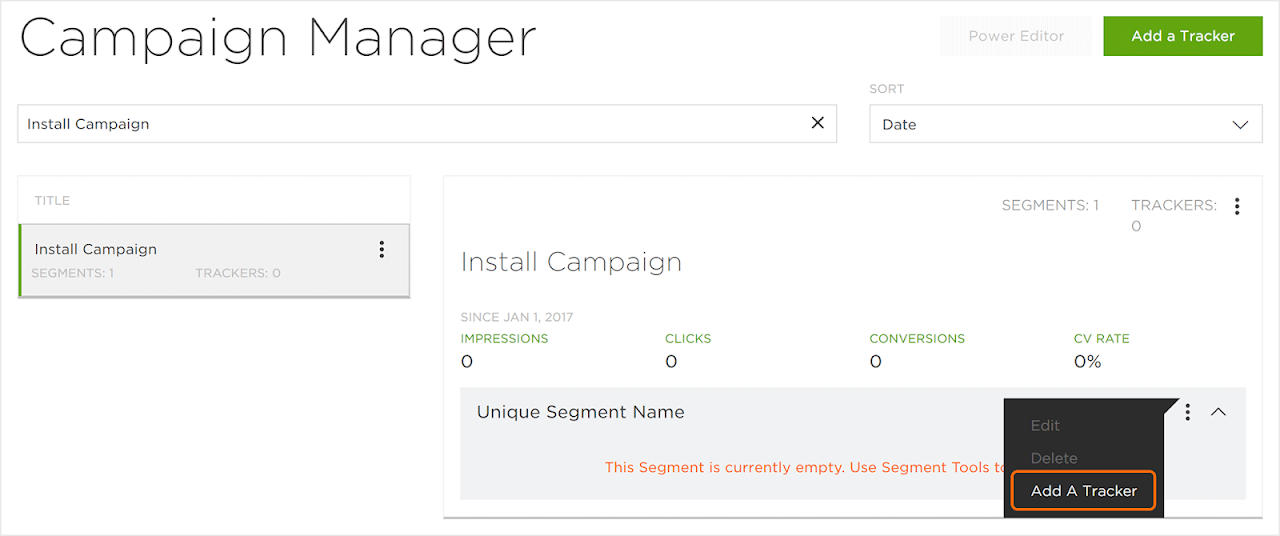
2. Campaign Manager:
- Click on "Add a Tracker" or use the Segment Tools (⋮) to select "Add a Tracker".
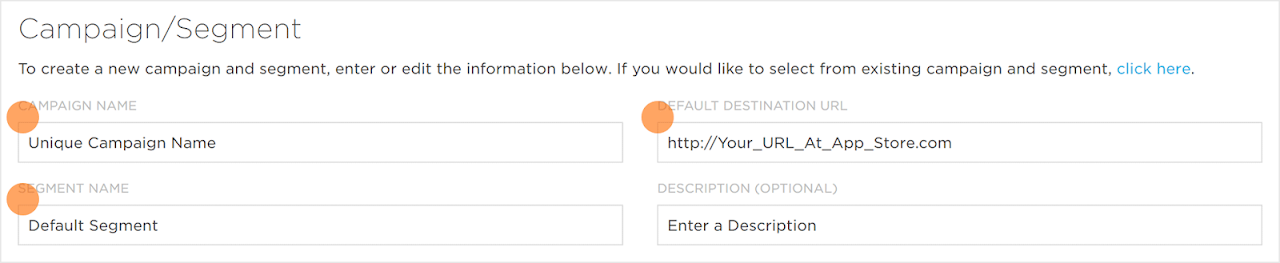
3. Campaign / Segment:
- On the next screen, choose an existing campaign or create a new one by clicking on "Click Here". Enter a Campaign Name and Segment Name.
- Enter the App Store URL in the "Default Destination URL".
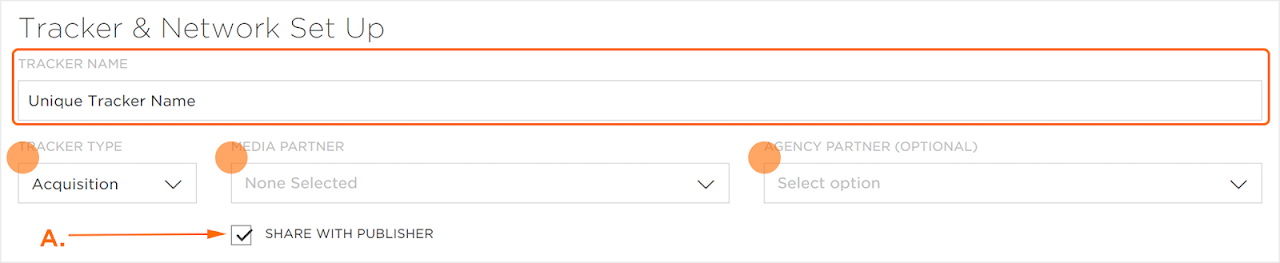
4. Tracker & Network Set Up:
- Name your tracker by selecting a custom Tracker Name.
- Set the Tracker Type:
- Choose "Acquisition" for User Acquisition.
- Choose "Reengagement" for Retargeting.
- Select mDSP as the Media Partner.
- Check the "Share with Publisher" box. This setting allows mDSP to view only the settings for this tracker.

5. Event Matching:
- Under Destination URL, set the Type to Custom and input the App Store URL as the Destination.
- Note: You may pass all the Deep Links to your mDSP Account Manager for setup on their internal platform.
- In Event Matching, select "All".
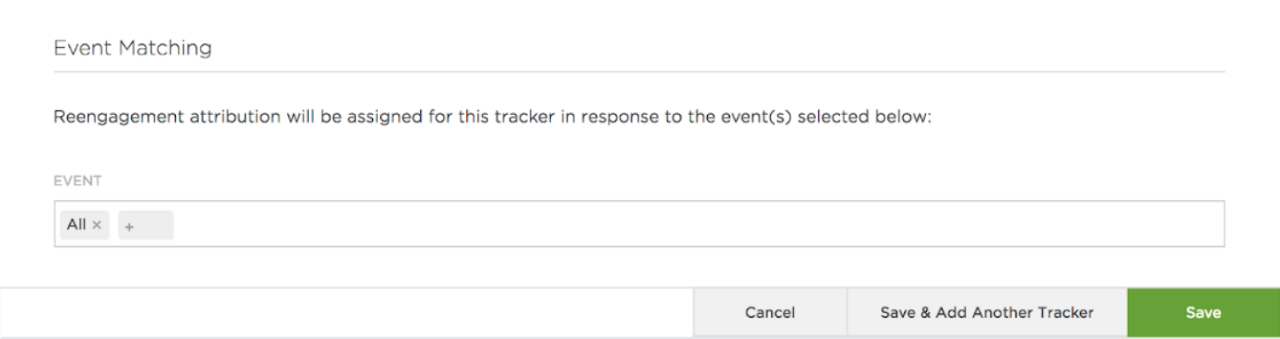
Optional: You may add Custom parameters with fixed values if desired; however, it is not required as all relevant parameters will be automatically included in the tracking link.
6. Final Steps:
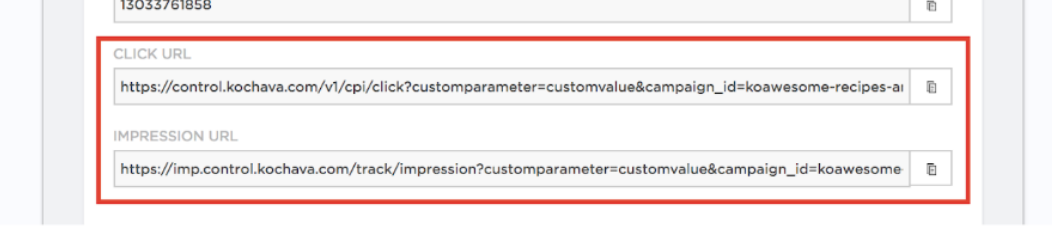
- Once completed, send both the generated Click URL and Impression URL tracking links to the mDSP team. Repeat this process for each different Tracker configured.
The next section will cover granting partner access.
3. GRANTING PARTNER ACCESS
To grant mDSP access to specific trackers, simply ensure the "SHARE WITH PUBLISHER" box remains checked as outlined in the previous section when generating the tracker.
Thank you!
This will enable us to verify that all numbers are accurate!
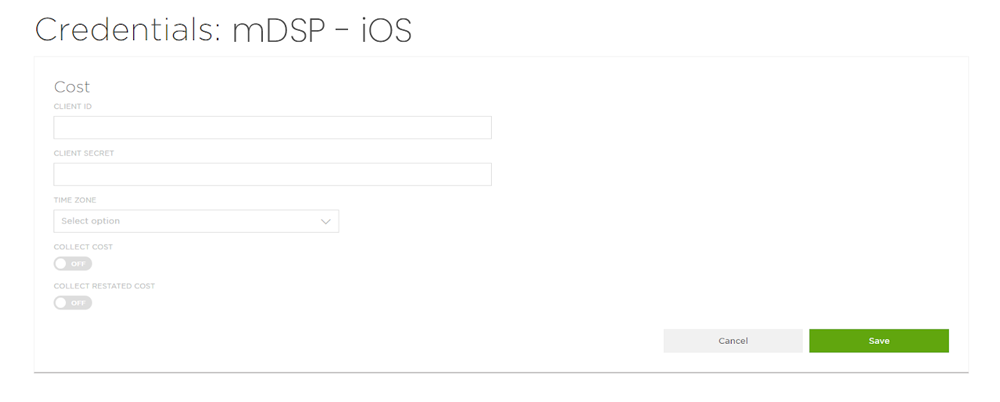
4. SHARING COST DATA
Instructions on how to view mDSP cost data in the Kochava Dashboard:
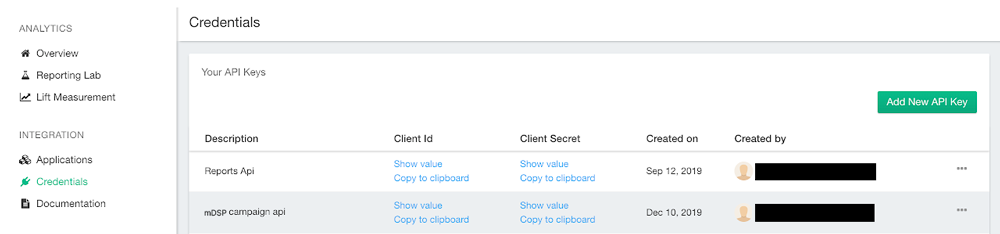
1. Obtain API Credentials from mDSP:
- Log into your mDSP Dashboard.
- Navigate to "Credentials".
- If no API Key is present, create one with a memorable name (e.g., "Kochava Cost").
- Safely copy your Client ID and Client Secret.
- PS: You may request your mDSP account manager to assist with this process :)
2. Activate Cost-Sharing Function in Kochava Dashboard:
- Click on "Apps & Assets > Partner Configuration".
- Find mDSP.
- Select "Network Tools (⋮) > Credentials".
- Input your Client ID and Client Secret.
- Toggle "Collect Cost" to On.
- Toggle "Collect Restated Cost" to On.
- Click "Save".
Done! You should now be able to see mDSP aggregated cost data on your dashboard, which will be refreshed daily. If you have any questions, please consult your Kochava or mDSP manager.